Spring MVC, one of the modules of the core Spring framework, is a web-application development framework. As the name suggests, Spring MVC is an implementation of the Model(M), View(V), Controller(C) design pattern, which is based on request delegation and separation-of-concerns.
I am assuming, that if you have reached this article and are about to use it, you would be familiar with the basics of web-application development and the Spring framework in general. And Java of course ;)
I will briefly introduce you to the basics of how Spring MVC works and then will build a simple web-application (find the sample application source code for download at the end of the page).

These components are wired together using the Spring IoC and Dependency Injection mechanisms.
There are two approaches that you can use to build your web application.
1. use xml configuration files.
2. use annotated java classes.
Although you cannot completely give up configuration files, you can save your self quite a bit of xml slurping by using java annotations.
You can also mix and match and use a hybrid of both the approaches. Whatever suites you best.
Since annotation based controllers are gaining popularity and are favored by most java developers, i will be using this approach through most part of the demo.
So, it's time to get started!
I will be using the SpringSource Tool Suite that can be downloaded from here. STS is an enhanced eclipse environment specially designed for Spring support. But you can also use your eclipse installation, and install some plugins for Spring support.
STEP1: Download and unzip STS and create a new project using the 'Spring Template Project' option on the dashboard. This template will generate quite a bit of boilerplate code for you, so you can concentrate on your application logic.

Note: If you are not using the STS Spring MVC template, you will have to write your configuration files yourself. The IDE saves you quite a few keystrokes. Strongly recommended.
 STEP 3: Write your first Controller & Test!
A simple controller would already be created in your project - HomeController. Infact, at this point, you can try to run the application. Right click the project, click 'Run as' , and then 'Run on server'. When the server has started successfully, try to access http://localhost:8080/CMSApp/, you should be able to see something like this ->
If you are not using Maven, you would need these libs in your classpath:
 If you are not using the STS IDE, you simply need to create a controller class that looks like this:
@Controller
public class HomeController {
@RequestMapping(value="/", method=RequestMethod.GET)
public String home() {
logger.info("Welcome home!");
return "home";
}
}
and a jsp file named 'home.jsp' in /WEB-INF/views/home.jsp that prints a welcome message.
But how real is our application right now? Not very. Let's add some business logic to it.
STEP 4:Create a service and a domain class
We will create a few simple pages to add customers to the system, and list all the existing customers. The application can be enhanced further to support all the CRUD operations. But create and list should be just fine to begin with.
Since we are here to learn about Spring MVC, i will keep the service class really simple. The service class will contain the business logic to list and save customers. For simplicity sake, we will not be persisting any data to a database, instead we will add the customers to a static list; avoiding any database setup.
A very basic Customer class that looks like this:
The service class would typically lie in a separate package say : com.test.cms.service
A snippet from CustomerService.java
STEP 5: Create a Controller for handling multiple actions.
This is where the heart of the tutorial lies. The CustomerController class is annotated with the @Controller annotation so that it is scanned by the Spring container at startup.
Next, notice the @RequestMapping annotation. Any request that matches the URL pattern and request method provided in the 'value' and 'method' attributes would be delegated to the corresponding method.
When the user hits http://localhost:8080/cmsapp/customer, the listCustomers() method is executed.
This method has access to a ModelMap object to which objects can be added using the addAttribute method, and can be passed on to the 'view'. There are a handful of other approaches you could use. For example @RequestParam which you can use to read parameters directly from the request. To access a particular model attribute from the incoming 'post' request, the @ModelAttribute is used. The logical name of the view is returned which leads to the view jsp to be used to render the attributes added to the ModelMap. In this case, we have the listCustomer.jsp and createCustomer.jsp view files. Let's take a look at the jsp files next
STEP 6: Create the view files
The view files are simple jsp files, which render the model that is passed on to them.
The list.jsp file iterates through the 'customers' list passed to it and formats them into a table. A snippet below:
We're now finally ready to run our application!
STEP 7: Run the web-application
Right click your project and run the application on the tc server. Browse to http://localhost:8080/CMSApp/customer/create and you should see :
Enter the details and press the submit button and you would see a list of existing customers

There you go! You have your first Spring MVC application up and running.
This is a very basic application. Spring provides a lot of capabilities that you can explore. You can add validations to your fields, use themes, add locale support; the list is long.
Hope you find this article useful.
Happy coding!
Download the sample application : CMSApp.rar
I am assuming, that if you have reached this article and are about to use it, you would be familiar with the basics of web-application development and the Spring framework in general. And Java of course ;)
I will briefly introduce you to the basics of how Spring MVC works and then will build a simple web-application (find the sample application source code for download at the end of the page).
Spring MVC web-flow
Spring MVC uses a request delegation model, where all the incoming requests are delegated to a 'Front Controller' called DispatcherServlet. This servlet has no business logic; it's sole purpose is to route the request across the system. The servlet uses different strategies (HandlerMapping) to determine the controller to which the incoming request needs to be delegated. The request is then sent to the controller determined by the HandlerMapping. The controller would typically call service class methods that contain all the business logic, and after all the necessary processing is done, the controller returns a logical view name and a model back to the DispatcherServlet. The DispatcherServlet, again uses several strategies (ViewResolver) to determine which View needs to be used to render the model. The model is rendered using the view returned from the ViewResolver and the response is sent back to the user.These components are wired together using the Spring IoC and Dependency Injection mechanisms.
There are two approaches that you can use to build your web application.
1. use xml configuration files.
2. use annotated java classes.
Although you cannot completely give up configuration files, you can save your self quite a bit of xml slurping by using java annotations.
You can also mix and match and use a hybrid of both the approaches. Whatever suites you best.
Since annotation based controllers are gaining popularity and are favored by most java developers, i will be using this approach through most part of the demo.
So, it's time to get started!
Spring MVC sample applicaiton : Customer Management System
There are a lot of IDEs available with Spring support that enable you to fasten your development process.I will be using the SpringSource Tool Suite that can be downloaded from here. STS is an enhanced eclipse environment specially designed for Spring support. But you can also use your eclipse installation, and install some plugins for Spring support.
STEP1: Download and unzip STS and create a new project using the 'Spring Template Project' option on the dashboard. This template will generate quite a bit of boilerplate code for you, so you can concentrate on your application logic.
Choose 'Spring MVC project' from the Template Selection screen. Type a project name and a top-level package name
STEP 2: Configuration files. You will find a couple of xml configuration files have already been created for you. Let's take a look at the most important ones.
a) web.xml
The DispatcherServletis declared in web.xml. You also need to specify the url-pattern to determine which requests are to be routed to the DispatcherServlet. In this case, all requests will be routed to DispatcherServlet ('/'). The DispatcherServlet needs to load the spring ApplicationContext, and the base configuration xml name is passed via the init-param. If nothing is passed, it will look for a file names <servlet-name>-context.xml in the classpath by default. Here's a snippet from the web.xml file:
<servlet><servlet-name>appServlet</servlet-name>
<servlet-class>org.springframework.web.servlet.DispatcherServlet</servlet-class>
<init-param>
<param-name>contextConfigLocation</param-name>
<param-value>/WEB-INF/spring/appServlet/servlet-context.xml</param-value>
</init-param>
<load-on-startup>1</load-on-startup>
</servlet>
<servlet-mapping>
<servlet-name>appServlet</servlet-name>
<url-pattern>/</url-pattern>
</servlet-mapping>
Note: If you are not using the STS, you will need to add these servlet mappings to your applications web.xml file yourself. (as i said, the IDE saves does a lot of writing for you.)
b) servlet-context.xml
This is the base configuration file of your Spring MVC application. As mentioned earlier, we will be using the annotation based mechanism for declaring our Controllers, we need to specify this in the servlet-context.xml by specifying the annotation-driven tag. Also, we will be using the InternalResourceViewResolver to resolve the view to be used to render the model using a logical view name. So if the logical view name is 'index', the application will look for the following file: /WEB-INF/views/index.jsp
In the controllers.xml file, you will see an entry<annotation-driven /><beans:bean class="org.springframework.web.servlet.view.InternalResourceViewResolver">
<beans:property name="prefix" value="/WEB-INF/views/" />
<beans:property name="suffix" value=".jsp" />
</beans:bean>
<beans:import resource="controllers.xml" />
<context:component-scan base-package="com.test.cms.web" />This entry specifies that the Spring container needs to perform a component scan to look for annotated java classes, and this scan needs to begin from the base-package. Thus this basically tells the application, that it should expected @Controller annotated classes.
Note: If you are not using the STS Spring MVC template, you will have to write your configuration files yourself. The IDE saves you quite a few keystrokes. Strongly recommended.
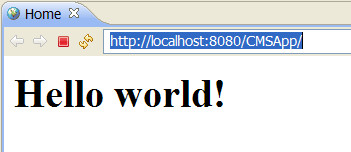
STEP 3: Write your first Controller & Test!A simple controller would already be created in your project - HomeController. Infact, at this point, you can try to run the application. Right click the project, click 'Run as' , and then 'Run on server'. When the server has started successfully, try to access http://localhost:8080/CMSApp/, you should be able to see something like this ->
If you are not using Maven, you would need these libs in your classpath:
@Controller
public class HomeController {
@RequestMapping(value="/", method=RequestMethod.GET)
public String home() {
logger.info("Welcome home!");
return "home";
}
}
and a jsp file named 'home.jsp' in /WEB-INF/views/home.jsp that prints a welcome message.
But how real is our application right now? Not very. Let's add some business logic to it.
STEP 4:Create a service and a domain class
We will create a few simple pages to add customers to the system, and list all the existing customers. The application can be enhanced further to support all the CRUD operations. But create and list should be just fine to begin with.
Since we are here to learn about Spring MVC, i will keep the service class really simple. The service class will contain the business logic to list and save customers. For simplicity sake, we will not be persisting any data to a database, instead we will add the customers to a static list; avoiding any database setup.
A very basic Customer class that looks like this:
The service class would typically lie in a separate package say : com.test.cms.service
A snippet from CustomerService.java
public class Customer {The service class looks like this:
String firstName;
String lastName;
String gender;
String emailAddress;
String phoneNumber;
public String getFirstName() {
return firstName;
}
public void setFirstName(String firstName) {
this.firstName = firstName;
}
....
//remaining getters and setters
....
}
public class CustomerService {CustomerService is a simple class with functions to add a new customer to a statically maintained arraylist and to return a list of all existing customers.
static ArrayList<Customer> customers = new ArrayList<Customer>();
public void addCustomer(Customer customer) {
customers.add(customer);
}
public ArrayList<Customer> listCustomers() {
return customers;
}
}
STEP 5: Create a Controller for handling multiple actions.
This is where the heart of the tutorial lies. The CustomerController class is annotated with the @Controller annotation so that it is scanned by the Spring container at startup.
@Controllerand add the following to servlet-context.xml
public class CustomerController {
@Autowired
CustomerService customerService;
@RequestMapping(value = "/customer", method = RequestMethod.GET)
public String listCustomers(ModelMap model) {
ArrayList<Customer> customers = customerService.listCustomers();
model.addAttribute("customers", customers);
return "listCustomers";
}
@RequestMapping(value = "/customer/create", method = RequestMethod.GET)
public String createCustomer(ModelMap model) {
Customer customer = new Customer();
model.addAttribute(customer);
return "createCustomer";
}
@RequestMapping(value = "/customer/create", method = RequestMethod.POST)
public String addCustomer(@ModelAttribute("customer") Customer customer) {
customerService.addCustomer(customer);
return "redirect:/customer";
}
}
<beans:bean id="customerService" class="com.test.cms.service.CustomerService" >The customerService has been autowired into the controller class. The container will look for a bean of type customerService and wire it with the controller.
</beans:bean>
Next, notice the @RequestMapping annotation. Any request that matches the URL pattern and request method provided in the 'value' and 'method' attributes would be delegated to the corresponding method.
When the user hits http://localhost:8080/cmsapp/customer, the listCustomers() method is executed.
This method has access to a ModelMap object to which objects can be added using the addAttribute method, and can be passed on to the 'view'. There are a handful of other approaches you could use. For example @RequestParam which you can use to read parameters directly from the request. To access a particular model attribute from the incoming 'post' request, the @ModelAttribute is used. The logical name of the view is returned which leads to the view jsp to be used to render the attributes added to the ModelMap. In this case, we have the listCustomer.jsp and createCustomer.jsp view files. Let's take a look at the jsp files next
STEP 6: Create the view files
The view files are simple jsp files, which render the model that is passed on to them.
The list.jsp file iterates through the 'customers' list passed to it and formats them into a table. A snippet below:
<table border="1">And the createCustomer.jsp file has a form and a submit button.
<tr>
<th>Name</th>
<th>Email</th>
<th>Phone</th>
</tr>
<c:forEach items="${customers}" var="customer">
<tr>
<td>${customer.firstName} ${customer.lastName }</td>
<td>${customer.emailAddress}</td>
<td>${customer.phoneNumber}</td>
</tr>
</c:forEach>
</table>
<form:form method="POST" commandName="customer">
<table>
<tr>
<td>First Name :</td>
<td><form:input path="firstName" /></td>
</tr>
<tr>
<td>Last Name :</td>
<td><form:input path="lastName" /></td>
</tr>
<tr>
<td>Gender :</td>
<td><form:radiobutton path="gender" value="male" label="M" /> <form:radiobutton
path="gender" value="female" label="F" /></td>
</tr>
<tr>
<td>Email Address :</td>
<td><form:input path="emailAddress" /></td>
</tr>
<tr>
<td>Phone Number :</td>
<td><form:input path="phoneNumber" /></td>
</tr>
<tr>
<td colspan="2"><input type="submit"></td>
</tr>
</table>
</form:form>
We're now finally ready to run our application!
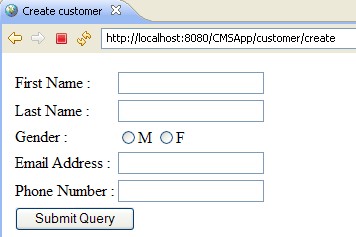
STEP 7: Run the web-application
Right click your project and run the application on the tc server. Browse to http://localhost:8080/CMSApp/customer/create and you should see :
Enter the details and press the submit button and you would see a list of existing customers

There you go! You have your first Spring MVC application up and running.
This is a very basic application. Spring provides a lot of capabilities that you can explore. You can add validations to your fields, use themes, add locale support; the list is long.
Hope you find this article useful.
Happy coding!
Download the sample application : CMSApp.rar
Thanks for the tutorial!
ReplyDeleteThanks very much for taking the time to post this. Very helpful! I have to get up to speed on Spring MVC very quickly and this is a huge help.
ReplyDeleteAll the best to you and yours . . .